Quantcast
Channel: MalwareTech

Hard Disk Firmware Hacking (Part 3)

$
0
0
Before we get started with part 3, I have a few updates regarding part 1 & 2.

I've found that the reset pad on the JTAG header is not actually a system reset (SRST) but a TAP reset (TRST), which isn't very useful for debugging. Here is the updated layout with the system reset signal added (this will allow the 'reset halt' command to break on the reset vector, before any instructions are executed).


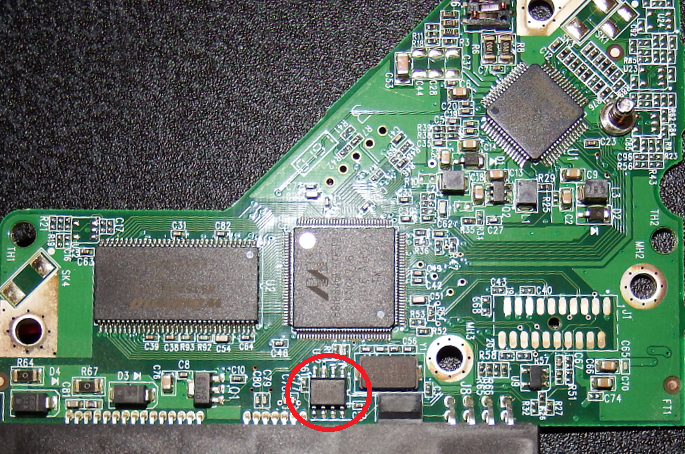
In my case there wasn't a test pad for the SRST line, but there was a very small exposed bit of copper underneath the serial sticker, which was connected to the SRST pin of the CPU.

Ceriand on Reddit pointed out that the JTAG header matches the footprint of a MICTOR connector (38 or 40 pin one usually), so if you don't want to do any soldering you could get yourself a MICTOR connector and cable.

MICTOR 38 connector

I've also found out the hard way that older PSUs don't like to be used at extremely low voltage (components inside them tend to explode), so I recommend buying a decent AC to Molex power adapter (don't get the cheap ones, they die after a day).

Apparently glass fuses like to explode and send shards flying everywhere

Lastly: because the JTAG header has an RTCK connector, you should be able to set adapter_khz in the openocd config to 0. The JTAG can then use adaptive clocking, which should prevent any timeout errors.

Bootstrap & Bootloader

After some reversing I'm now convinced that the bootstrap code in Part 2 is not used during a normal boot. On execution it waits for some data on a port (most likely the serial port), then acts accordingly. If no data is found, the code goes into an infinite loop and the drive never boots.


On this CPU the 0x1C00A000 - 0x1C00AFFF range appears to be mapped to various ports and test pads all around the PCB. Now, because I don't have the money for an oscilloscope or decent logic analyzer I'm going to have to pass up on mapping these ports, even though it would make things easier.

All this code does is read some kind of switch which enters the system into a specific mode based on the value:
  • 4 - Not sure, but it waits infinitely for a value on some port. My assumption is this code probably allows developers to read/write/erase the processor's internal flash.
  • 3 - Jumps to the address in R4 (in my case this is 0, but that could be by design)
  • 6 - A serial console which looks for ASCII bytes (r, w, j, h) on the serial port, allowing the developer to send read, write, jump, and halt commands.
I'm not familiar with how ports are mapped to memory, but 0x1C00A030 is always 0 while 0x1C00A03A is always 0xFFFF (which I assume means one is constant at a low voltage and the other constant at a high voltage).

Interestingly if we set a hardware breakpoints on "cmp R1, #3" and set R1 to 3, the code will jump to address 0 and boot normally (this is why I think 0 doesn't mean uninitialized). Let's see what's at address 0.


Address 0 is usually RAM, but there's already valid code here, so it's quite likely the CPU temporarily maps address 0 to some area of the internal ROM during boot. This is a standard ARM IVT, which you'd see at the boot address of any ARM devices; making me think the bootstrap at 0xFFFF0000 is only executed if the CPU detects a JTAG is attached. Until I can buy a decent logic analyzer and figure which port allows us to control the bootstrap mode switch, the only apparent way to boot the disk normally with a JTAG attached is to perform a "reset halt" then manually set R1 to '3' just before the check.

In this case the boot code is all over the place with massive gaps between sections, my next step will be to map, dump, and reverse it. I'd probably have done that already, but my power adapter didn't arrive untill yesterday. 


Hard Disk Firmware Hacking (Part 4)

$
0
0
It seems that the bootstrap code is just scattered around various memory addresses and there's no simple way to dump all of it, so i decided to just dump a chunk of memory from 0x00000000 and look for any reference to addresses outside of that chunk (allowing me to build up a basic map of the code).

Although the exact addresses vary between disk models, my layout should give you a good idea where to look.

  • 0x00000000 - 0x0000A520
  • 0x0000EA24 - 0x00014F74
  • 0xFFE19E00 - 0xFFE34D9A
  • 0xFFFF2800 - 0xFFFF2800

After poking around, i found it was reading some code into memory from somewhere, which I assumed to be the flash.
First few bytes of the flash

The flash starts with a table which spans from 0 to 0x120 (the start of the first block), each table entry is 32 bytes and follows the same format (see: image). Each block has an id from 1 to n, with the exception of the first block which is always 0x5A.

The block at 0x5A is some kind of bootloader which likely reads and decompresses the rest of the blocks from flash, but I'm not sure yet as it's proving a problem to reverse. I wanted to intercept this bootloader at the entry point, which sounds easy, it's not.

  • At some point during the bootstrap process my hardware breakpoints stop working, it could be that the processor is overwriting the register, remapping memory, or disabling them all together; but I've not found the issue yet. This means I can't simply set a breakpoint on the bootloader entry point (0x19000).
  • The bootstrap code responsible for loading and executing the bootloader is in ROM, so I can't set software breakpoints either.
  • Watchpoints don't seem to work at all, even before my breakpoints stop working I can't get the code to break on any memory access.
  • Most of the code that isn't in ROM is using some kind of paging (aka overlaying), which reads certain regions of code into memory when they're needed, then replaces them when they're not, preventing the use of software breakpoints.

All in all, this was proving to be must more of a pain than I expected so I decided the easiest option would be to buy a drive with an external EEPROM chip, instead of one built into the MCU. This way I could write software breakpoints directly to the flash chip with an EEPROM programmer.


 Hardware and firmware wise this disk is pretty much identical, except the firmware is now stored in a 256k SPI flash chip, instead of in the MCU's internal memory. The first thing I did was use a multimeter to see if there's anywhere on the top of the PCB i could connect to the flash chip (so I didn't have to desolder it or keep unscrewing the PCB from the disk).


WP# and HOLD# are shorted to VCC, so they're not a problem and the rest of the required pins are brought out to the test pads around E11. I tried connecting my TUMPA's SPI interface to the test pads and using the flashrom software, but it was unable to detect the chip. I'm not sure if this is because my TUMPA isn't capable of in-circuit programming, or there is other stuff on the same data lines, but it I simply couldn't get it to work.

My new plan is to get a SOIC clip, a decent EEPROM programmer, and a desoldering station for if neither of the other option work; In the mean time I will be trying to find out what's stopping my breakpoints from working and see if i can remedy that. I'll probably not have another update until all my stuff gets delivered and I have a few days to try it all out.

Hard Disk Firmware Hacking (Part 5)

$
0
0

"Discovery requires experimentation"

This weekend I made a pretty big breakthrough which lead to me making a few smaller breakthroughs and ultimately negating most of my previous research. I've also learned that "not reinventing the wheel" isn't always the best option, especially when it comes to trusting other people's research. 

One of the main goals was to find a way to quickly and easily reprogram the hard disk, given physical access. In the spritesmods post he had remove the flash chip from the PCB and attached it to some veroboard, so he could swap it between the hard disk and the flash programmer. Obviously it's not very practical for me to have to keep disconnecting and reconnecting the flash chip, and especially impractical for an adversary looking to quickly infect a disk. 

As most already know, it is possible to flash WD hard disk firmware from within the OS as long as the account has Admin/Root privileges. The disk must be running in order to accept SATA commands and must be restarted to load the new firmware. If the new firmware has errors the disk cannot start, therefore the firmware cannot be fixed (this is known as bricking). Due to the fact I'm hacking about with the firmware I'm likely to brick the device, so i needed another way of flashing it.

In-Circuit Programming

In circuit Programming (ICP) is the ability to program a flash chip or other component, while it's still connected to the circuit. In the last article I was able to find the test ports that connected to the flash chip, but was unable to program it, however; after some experimentation over the weekend I finally managed to achieve ICP. 

The Problem
One of the biggest problems with ICP is that in order to write the flash chip you need to power it, but because it's connected to the rest of the circuit you end up powering other chips, which send data on various buses and interfere with your attempts to talk to the flash.

To prevent interference on the SPI bus, it's usually enough to hold down the reset button or short the reset signal to ground, resulting in the system being held in reset and unable to start (giving you uninterrupted access to the flash's bus). 

Here's a list of what I'd tried. 
  • Powering the flash directly with 3.3v supply
  • Powering the flash directly with 3.3v supply while holding the system in reset
  • Powering the entire system by plugging in the HD
  • Powering the entire system by plugging in the HD while holding the system in reset
I was ready to give up as nothing was clearly working (my SPI programmer couldn't so much as detect the flash chip), but on Saturday I decided to have one last go, and it worked straight away (sort of). 


The SPI programmer was able to detect the flash chip, but most of the data being read was erroneous. On investigation I found that the VCC (power) wire had come unstuck from the test point and was now hanging off the desk. So if the VCC wire wasn't connected and the system wasn't plugged in, how was it reading the flash chip?

After more experimentation I found that the circuit was set up in such a way that some of the voltage being sent to the MISO pin (about 1.2v of it) was somehow feeding back onto the VCC rail and powering the chip....wat. As I've said I'm not an electronics expert, and this had me completely baffled, but it also showed me that reading the chip in circuit was possible, i just needed to learn its secrets. 

The Solution
After extensively more experimentation with a side order of experimentation and failure, I found that holding the system in reset (the solution to most ICP problems) was actually the only issue. I had been leaving the JTAG connected to the system and it was pulling the reset pin low (holding it in reset), so when I wasn't holding the system in reset the JTAG was. After disconnecting the SRST (reset) pin of the JTAG, everything worked perfectly as long as the disk wasn't plugged in and I powered the flash chip directly. It seems that this system is designed for ICP to be done without holding it in reset and doing so causes issues.

Here is the updated image from the last article.


If you have a USB device which allows for SPI programming and is supported by "flashrom", like I do. You can connect it to the computer and use flashrom to read, write, and erase the flash. The TUMPA is an especially nice board because it has 2 channels, so you don't have to disconnect the JTAG to use SPI.

Don't reinvent the wheel they said, It's a waste of time they said

Before i started hacking I'd decided to read other people's research to get a good idea of where to start. Resourceful, right? Well it actually turns out that most of the research I've based mine on was either wrong or just doesn't apply to this hard disk. 

I was under the impression that when connecting the JTAG and issuing a "reset halt" command, the system would be halted before any code was run, and I could step through the bootstrap while it read the bootloader from flash and execute it, this wasn't the case.

After playing around by writing my own code to the flash, i realized that it's is being read into memory and executed long before the system is halted. In fact it seems like the code at 0xFFFF0000 is just some kind of debug console which is only jumped to if a halt command is issued, or the reading / executing the code from flash fails. By the time the JTAG is able to connect and issue a command, the entire kernel has already been loaded and initialized, which explains why I couldn't set any breakpoints on the bootloader.

I can write a breakpoint to the flash so that an exception is generated and the system fails to load, then remove the breakpoint and manually jump back to the bootloader, but for whatever reason the system doesn't boot properly the second time. This isn't a huge issue because I can still debug the bootloader up until the a certain point (as long as any code I write is run during early boot, I can debug that too), but until I can find why it fails the second time, there is a window of time between the late boot stage and early kernel initialization where I can't debug. 

Success


My main goal was to inject code into the firmware both by running an executable on the target computer and with physical access to the hard drive, which I've achieved. Now I'll just poke around and see what I can do with it.

If you're wondering how easy it would be for an attacker to infect a hard drive's firmware, here are two quick ways they could to do it.
  1. Sending firmware update commands over the SATA interface from the host computer (requires root/admin).
  2. Create a portable SPI programmer that can flash the firmware by being pressed against the test points on the bottom of the hard drive (would only take about 5 seconds). 
Something...something...aliens...something...something...government... *puts on tinfoil hat*

Hard Disk Firmware Hacking (Final)

$
0
0

Core 2, I choose you.

Less than 5 minutes after posting the last article, i discovered the final piece of my puzzle: a second CPU core. I was looking through my OpenOCD configuration when I realized it had a single tap definition hardcoded, so i decided to comment it out and let OpenOCD try to automatically discover the taps. 


Auto probing found two TAPs with the same id, which I assumed to be two different cores, so I updated my config accordingly. 
Here's a new config designed to work with both cores:
transport select jtag
adapter_khz 100

jtag newtap auto0 tap -irlen 4 -expected-id 0x121003d3
jtag newtap auto1 tap -irlen 4 -expected-id 0x121003d3

target create auto0.tap feroceon -endian little -chain-position auto0.tap
target create auto1.tap feroceon -endian little -chain-position auto1.tap

reset_config srst_only
adapter_nsrst_delay 200
jtag_ntrst_delay 200
After a few small adjustments, all that was left to do was run OpenOCD and see what secrets the new core holds.


Once I'd connected to the JTAG via IDA, everything was clear. I could see that the second core was stopped on the breakpoint I'd written to the flash chip. This was the core responsible for loading and executing the bootloader, whilst the core I had been looking at before just waits in a loop. Obviously the bootstrap code must be different for core 2, because the other bootstrap just loops until a later time. 


It's clear that core 1's bootstrap is just debugging / management code, whilst core 2 has a completely separate region of code mapped to the same address. Core 2 not only loads the bootloader from the flash, but also appears responsible for most of the interesting operations such as handling SATA requests and writing the cache descriptor.

Conclusion

So there you have it, using very little experience I was able to JTAG a WD hard disk, dump the firmware, and even discover how to read / write the flash chip using ICP. I'm definitely going to spend some more time poking about in the firmware to see how parts of it work, but because that's outside the scope of these articles, and to avoid boring people, this will be the last article of the series. If I manage anything interesting, I will likely post my findings in a whitepaper and upload it alongside a demo video. 

I'd like to continue posting both hardware and software articles (and some tutorial), so if you have any suggestions for either, send them to admin@malwaretech.com. 

Hope you've enjoyed a slightly different style of writing and learned something new.

MalwareTech SBK - A Bootkit Capable of Surviving Reformat

$
0
0
Since i got into firmware hacking, I've been working on a little project behind the scenes: A hard disk firmware based rootkit which allows malware to survive an operating system re-install or full disk format. Unfortunately I can't post a proof of concept for many reasons (people have even contacted me just to tell me not to post it), so instead I've written a presentation overviewing the rootkit, which I've dubbed MT-SBK.

The general purpose of MT-SBK is to provide a "framework" for my previous project, TinyXPB, A windows XP bootkit. This framework enables TinyXPB to be stored and loaded from within the hard disk firmware, preventing it from being removed by: antiviruses, operating system re-installs, or even full disk reformats. This rootkit is designed for a major brand of hard disk and can infect the firmware from within the operating system (no physical access required), it's also completely undetectable to software running on the host computer. 

The only way to remove MT-SBK is by replacing that hard disk's PCB or connecting an SPI programmer directly to the flash chip and flashing it with the original firmware. 

Windows 10 System Call Stub Changes

$
0
0
Recently I installed Windows 10 RTM and while I was digging around I happened to notice some changes to the user mode portion of the system call stub: these changes appear to break the current methods of user mode system call hooking on x86 and WOW64 (Recap: here).

Windows 10 x86

Native functions no longer make a call to ntdll!KiFastSystemCall via the pointer at SharedUserData!SystemCallStub (0x7FFE0300), in fact SharedUserData!SystemCallStub don't seem to point to anything anymore (This change was originally made in Windows 8, but like most people I'd rather just pretend that OS doesn't exist).

Now the system call stub is inline with one below each native function (I'm not really sure of the reason for the change but it is now impossible to hook all system calls with a single modification).
Windows 10 x86

Windows 10 x64 (WOW64)

Native function no longer call FS:[0xC0], instead they call a pointer in the same way x86 used to call KiFastSystemCall.
Windows 10 x64 (WOW64)

Wow64SystemServiceCall is not a fixed address like SharedUserData!SystemCallStub, instead it's the absolute address of a function within the wow64 ntdll.dll.
ntdll!Wow64SystemServiceCall

The code simply checks a flag in the PEB to decide if to use int 2Eh or normal system call, then as before it calls wow64cpu!CpupReturnFromSystemCallStub; however, this is now done by a pointer in the table pointed to by R15, instead of directly.

FS:[0xC0] is still usable for compatibility reasons, by it doesn't point to Wow64SystemServiceCall, nor does it point to the old code, instead it points to some more complicated version (wow64cpu!KiFastSystemCall) which does the same thing.
x86SwitchTo64BitMode (Pointed to by FS:[0xC0] on pre-Windows 10 systems)

As you can see the original method was just executing a single instruction which did a far jump to wow64cpu!CpupReturnFromSimulatedCode; The new method does exactly the same thing but with more instructions.
wow64cpu!KiFastSystemCall (Pointed to by FS:[0xC0] on Windows 10 x64)

It's hard to gauge exactly why the old code was replaces, but it may have something to do with the fact there is no longer any pointers to wow64cpu!CpupReturnFromSimulatedCode which can be accessed from 32-bit code, now the only way is to switch into 64-bit mode and retrieve the pointer from r15+0xF8.

Darkode Returns Following International Raids

$
0
0
When I was contacted asking for a comment about the darkode raid, I'd said that the main administrator was not arrested and that'd I'd be surprised if it wasn't back within a week; well It's been a little more than a week (I'll put on my surprised face), but as expected darkode has returned. Originally the main admin known as "Sp3cial1st" had posted a statement on pastebin declaring that he wanted to wait and see who all of the 70 users arrested were before bringing the forums back online, but about two hours ago he updated his jabber status to advertise darkode.cc, which appears to be a placeholder for the future site.

Darkode's new homepage
Currently we're greeted with a message addressing the raids and containing some information about the new site; however, the page currently leads nowhere and the "Generate Onion" button doesn't work (though the information given is quite interesting).

The message states that not only will darkode now operate from a Tor hidden service, but each user will be given their own onion address to the forum, which is admittedly quite a clever idea. Firstly it would allow the darkode admins greater control over who gets access, preventing people from accessing a hacked account without the owner's onion url; it would also allow them to better monitor who views what by creating an individual log file for each onion, meaning they could quickly weed out leakers.
Even more interesting it states that bitcoin wallets would be tied to accounts and used for users to authenticate on the forums, this would mean that hackers could not use a hacked account to scam with unless they know the user's private key.

These new security measured don't come as a huge surprise seeming as darkode had a massive problem with people using hacked accounts to leak information to law enforcement and journalists as well as scam users. Ironically even the darkode administrators were compromised at one point after one of them had reused his password on another forum, which had its database leaked a few weeks prior. Remember: Password reuse is a much bigger risk than weak passwords.

Arrests

Due to the fact that most countries do not publicly publish detailed arrest information like the US does, there is no way to know who else was arrested other than those indicted by the FBI; however, due to terrible opsec practices a lot of them were known personally by other members, so word of mouth gives us a few more names to add to the list. It's interesting to note that only about two of the arrested member had even been active on darkode in the past few years, suggesting that the FBI might have just grouped together a list of known criminals who were also on darkode, rather than targeting the forum itself.

As of now, this is the current list of arrested or allegedly arrested users:
  • h0tsh0t
  • Mafi AKA Crim AKA Synthet!c(Darkode admin)
  • Parabola (Darkode admin)
  • Nocen
  • Phastman
  • semaph0re
  • m3t4lh34d
  • rzor
  • k@exploit.im
  • Android (Developer of the Dendroid trojan)
  • SpliT
  • WesTThug

David Cameron Wants Porn Sites to Require Banking Information

$
0
0
It would seem that David Cameron doesn't have a tech advisory or even knows anyone who uses browser other than Netscape, but that doesn't seem stop him with his endless stream of proposals and laws to govern our internet. The latest idea in a long list of terrible ideas is arguable worse than his vaguely implied ban on cryptography, it also stems from an ongoing campaign by the DailyMail (Which is the British equivalent of fox news).

Backstory

Most people are familiar with the whole "violent video games make children violent" nonsense, here we've had a similar thing going for a while, but with internet porn. A couple of years ago the DailyMail decided that porn corrupts children and therefore it shouldn't be a parent's duty to install internet filters, instead they proposed that government should force ISPs to implement network level content filters which are enabled by default.

Well, unfortunately not only does David Cameron pay attention to the DailyMail, but he thought their suggestion was a brilliant idea, promptly releasing a statement making it clear that he wanted all ISPs to have the filters in place by the end of 2013. As of now, it's not yet been made law; however, the system has already been implemented by all major ISPs, requiring new customers to specify if they want to opt-out of the filter. Unsurprisingly parents are quite happy parenting their own children, seeing as the top three ISPs reporting that only between 4 and 8 percent of new customers opted-in to the filter (any guesses as to how many of them were technologically inept?).

Latest Proposal

It's now been decided that adult sites aren't doing enough to prevent those under the age of 18 from using their services, with Cameron outlining plans to require that sites properly enforce age verification or face being added to the ever growing list of websites blocked in the UK. The current suggestion is that adult sites should use credit card or bank details for age verification (the same way that most e-commerce sites currently do). Is this a good idea? Short answer: no, long answer: oh my god no.

Privacy Issues
When it comes to free porn, there is really no way to track visitors across sessions, at least not in the UK. Cookie and local storage data gets cleared after each private browsing session and almost all UK ISPs issue dynamic IP addresses, making IP tracking useless. 

If website uses were required to link personal information with their accounts, suddenly not only is everyone traceable across browsing sessions, but their browsing habits are tied to their real name. A lot of people have a problem with large companies gathering basic personal information for advertising purposes, so I'm sure it will be had to find anyone who doesn't have a problem with their porn history, name, and billing address being collected (probably a recipe for a very embarrassing call with your bank's fraud resolution department). 

Security
This is where the idea becomes really, really terrible. Most of the smaller free porn sites don't bring in a great deal of revenue, thus are unlikely to be employing security professional. When big multinational companies are getting breached left and right, does anyone really need small time porn sites hording financial information? Nothing compliments you banking information being stolen quite like your name, address and browsing habits appearing in the latest data dump.

Now of course, the above issues assumes the website was even legitimate in the first place. What's to stop the same people running malware infested porn sites from re-purposing them to harvest bank details? Most people browsing porn aren't exactly thinking with their head (well, at least not that one.), so even those wary of fraud are more likely to find themselves plugging their financial information into a shady site.

Conclusion

There is absolutely no way this idea works in any form, at best they find some kind of age verification method which doesn't involve sharing your financial information, in which case porn passes join the never ending list of vices for sale on the playground black market. Not to mention that just like with the UK's piracy filter and the EU right to be forgotten, it 's simply solved by setting up a VPN to access sites with an IP origination from another country. As always, parenting and politics should remain separate. 


User Mode Hook Scanner (Alpha)

$
0
0
I finally decided to write my first security tool based on an idea I had for advanced hook detection, I couldn't find any evidence of the method being used so I based a tool around it. It's still a working progress but I'm posting so I can get some feedback early on (Currently only x86 systems are supported, but this shouldn't be an issue as most researchers are running 32-bit VMs).


Advanced Scanning

The scanner will iterate the export table for the following system modules: ntdll.dll, kernel32.dll, kernelbase.dll, user32.dll, ws2_32.dll, and wininet.dll. Like a conventional scanner it will go through each instruction of the exported function, comparing it against a clean version of the dll which has been loaded from the disk. Normally at this point a hook scanner would either report the modification or check to see if it's a jump or call, but I've decided to take an extra step towards detecting obscure hooks.

Function Emulation
If any modification is found at any point within the function body, the scanner will use my basic x86 emulator to begin emulating the function, while tracing push, pop, mov, lea, jmp, call, and ret instructions. The emulator will try to determine if control flow is altered by the modified instructions and if so, which instruction redirects execution and to where.

The purpose of the emulator is to detect more obscure hooks as well as accurately determine the destination of the hook, beyond resolving basic jump and call instructions. A good example of where this is applicable is on hooks placed by carberp within the native call stubs of ntdll.

Consider this example call stub:
mov eax, 0xAA
mov edx, 0x7FFE0300
call dword ptr [edx]
retn 0x10
This function does not use a relative call, instead it moves a pointer into the edx register and performs an absolute indirect call with it. Carberp replaces the address moved into the edx register, resulting in redirecting the call to an arbitrary location, and not showing up in hook scanners searching for jmp/call hooks. More advanced hook scanners will log any modifications; however, the user would then have to disassemble the modified function and determine the destination address of the hook, which my engine does automatically (if it fails to resolve the location or detect a control transfer, the modification will still be logged for further investigation).

Destination Dumping

Most rootkits hook by injecting their code (usually shellcode or a PE file) into the target process, hooks are then set to point to locations within the injected code. If the tool is successfully able to work out the destination of a hook, it will query the page it points to and then map out all pages allocated with the same base address. Using this information it is possible to dump the rootkit's entire shellcode, injected PE or DLL, even if it spans multiple pages. 

Conclusion

Again, this is a working progress and I can't guarantee the current version won't be a huge steaming pile of crap. please email any feedback/issues to admin@malwaretech.com or leave a comment on this post.

Here's a demo video to prove it does at least work on my system:


Download Link: https://www.malwaretech.net/downloads/HookScanner.rar

Creating the Ultimate Tor Virtual Network

$
0
0
Although the methods in this article can be used for proper anonymity outside of the tor browser, the main focus is creating a secure tor based research environment. As most security researchers know there's always a big decision with analyzing malware or exploits in a VM, most people would prefer to reverse in an offline environment, but if you're monitoring C&C communications or a live exploit kit, this isn't viable. Do you use your real IP? Do you use 3rd party software such as  proxifier to try and force everything through tor, hoping no software leaks your IP to the bad guys? Do you even run your entire system through a VPN while you reverse and have to reconnect all your software afterwards?

Well, the solution I came up with was to create a transparent Tor proxy using a separate VM to act as a router, the virtual machine(s) used for research will then pass all traffic through Tor (with zero configuration or software, and without even being aware the proxy exists). Although the router will take about 15 minutes to set up, you can pass unlimited VMs through Tor with no extra configuration!

Here's an example of how easy it is to connect a brand new VM through tor using my setup (no proxy settings have been touched).


Router Installation

VM Requirements:
Ram - At least 200 MB
Disk - At least 500 MB

For the router I've chosen pfSense, a light, open-source FreeBSD based firewall/router. You can download the latest version from the official site. Although I will be using VMware Workstation, the tutorial should work on most VM software.

  1. Create a new VM how you normally would using the pfSense ISO (but don't power it on yet).
  2. Go into the VM settings and set the network adapter to use whichever settings you'd normally use to connect to the internet (this is usually "NAT"). 
  3. Click the "LAN segments..." button and add a new LAN segment. 
  4. Click the "Add..." button and add a new network adapter (just leave the default settings and click finish).
  5. Set the new adapter to use the LAN segment you created, leaving the other adapter how it is.


Now you can power on the VM. After a few seconds you should be met with the below screen, just press 1 and wait for the next screen.


The next screen will give you the option to invoke the installer by pressing "I", you should do this. If you don't select an option within 10 seconds, the boot will continue and you'll need to restart and try again.


In the installer you can just click "Accept these Settings", followed by "Quick/Easy Install" then "Ok".
The next prompt will ask you to install the kernel, select "Standard Kernel", wait for that to finish and allow the system to reboot (make sure to remove the CD before the VM starts back up to avoid any issues).

If everything went well, you will reach the welcome screen. At the top it should give information for the WAN and LAN adapter. WAN should be em0, which is the adapter you set to connect to the internet, whilst LAN should be em1, which is the adapter connected to the LAN segment. The IP address of the WAN adapter should correspond to an IP on the same subnet as your host computer's vmware adapter (usually "VMware Network Adapter VMnet8"). The LAN IP doesn't matter, as long as it's not on the same subnet as the WAN one.


By default the router's web control panel isn't accessible from the WAN for security reasons, so in order to access it you need to power up another virtual machine (preferably one you intent to connect through tor), and set the virtual network adapter to connect to the LAN segment you set up for the router.

Now you just need to open a browser and navigate to the LAN IP of your pfSense router (192.168.1.1 in my case) and you should be met with the following screen (login information is admin:pfsense).


You can skip through the setup wizard, change the login information at the end then go to the main configuration page.

You'll need to go to "Services > DNS Resolver" then uncheck "Enable DNS Resolver" and save settings (we'll use tor as our DNS resolver, allowing the system to also access .onion domains).

Tor Installation

You can either do this directly via the pfSense console (press 8 to drop into the shell), or you go into the configuration panel on your client VM and enable SSH by going to "System > Advanced", then checking the "Enable Secure Shell" checkbox, then clicking "Ok".

If you choose to use the SSH option, putty will have to be used from inside the client VM (The IP is the same as the control panel IP and the login information is the same as the admin panel).

Once in shell  we can install tor:
  1. pkg install tor
  2. rm -rf /usr/local/etc/tor/torrc
Open  "/usr/local/etc/tor/torrc" and edit then save the following comfig:
DNSPort 53
DNSListenAddress YOUR_PFSENSE_LAN_IP_HERE
VirtualAddrNetworkIPv4 10.192.0.0/11
AutomapHostsOnResolve 1
RunAsDaemon 1
TransPort 9040
Now we can add tor to start at boot and run it:
  1. touch /usr/local/etc/rc.d/tor.sh
  2. cd /usr/local/etc/rc.d/
  3. echo "/usr/local/bin/tor">> tor.sh && chmod +x tor.sh
  4. /usr/local/bin/tor

Firewall Setup

Now we need to set up the rules to proxy through tor; unfortunately you can't forward the entire port range so it's better to just add a port forwarding rule for each of the major ports (HTTP, HTTPS, IRC, etc), then any traffic not matching the rule can be blocked.

First we need to go to "Firewall > Nat > Port Forwarding" and add a rule for each TCP port or port range we want to forward through tor (you can just add HTTP and HTTPS ports, then add more later).

The rule is as follows:
  • Interface: LAN (Traffic from VMs)
  • Protocol: TCP
  • Source: Any (All devices on the LAN)
  • Destination: not LAN net (Ignore traffic between VMs or the VMs and pfSense router)
  • Destination port range: from 80 to 80 (HTTP)
  • Redirect Target IP: 127.0.0.1 (The pfSense router)
  • Redirect target port: 9040 (The transparent proxy port we set in tor config)
  • Description: Doesn't matter, put what you want.

Repeat the above rule for each destination port/port range you want to pass through tor (443 for HTTPS, 22 for SSH, etc), you cannot forward the entire range (1 to 65535), but you can forward most. It should be noted that tor doesn't support UDP, so you'll either have to not forward UDP traffic or use your real IP.

Now go to "Firewall > Rules > LAN" and delete both the IPv4 and IPv6 rule with the description "default allow LAN IPv4/6 to Any". 


Deleting the following rules will block all traffic that doesn't follow the port forward rules (isn't passed through tor), this means we will need to create a rule allowing allow DNS requests to the pfSense server. In "Firewall > Rules > LAN" create a new rule with the following settings:

  • Action: Pass (Allow traffic matching this rule)
  • Interface: LAN (Traffic from VMs)
  • TCP/IP: Version: IPv4
  • Protocol: TCP/UDP (DNS can be both)
  • Source: LAN net (From VMs)
  • Destination: (type): Single host or alias
  • Destination (address): The LAN ip of your pfSense router.
  • Destination port range: from 53 to 53
  • Description: Allow DNS
If you want to allow traffic between VMs connected to the router, add the following rule:
  • Action: Pass (Allow traffic matching this rule)
  • Interface: LAN (Traffic from VMs)
  • TCP/IP: Version: IPv4
  • Protocol: TCP/UDP 
  • Source: LAN net (From VMs)
  • Destination: LAN net (To VMs)
  • Destination port range: from Any to Any
  • Description: Allow VM Communication
You're all done! you should be able to check your IP using dnsleaktest.com and it should not be able to detect your DNS (the STUN exploit will also not work, even if you enable WebRTC).


Advanced Desktop Application Sandboxing via AppContainer

$
0
0
This post is kind of a follow on from my previous article Usermode Sandboxing, so if you've not yet read that you should do so first.

AppContainer was a fairly quietly introduced feature in Windows 8, which is a shame as it provides some great features which can be used for desktop application security too (Few people are aware that it's not just used for Apps as the name might suggest). I'll go over some of the features which stood out to me.

Network Restrictions
A feature previously lacking in the Windows integrity mechanism was proper network restrictions. Low integrity processes could still freely create sockets, which would allow malicious code to escape a sandbox by exploiting a vulnerable higher integrity process listening on the host.

AppContainer introduces some new network restrictions such as:

  • WinCapabilityInternetClientSid - Application can make outbound connections but not listen on sockets.
  • WinCapabilityInternetClientServerSid - Application can create listening sockets but not make outbound connections.
  • WinCapabilityPrivateNetworkClientServerSid - Application can listen or make outbound connections to IPs within the host's local network (not to external networks i.e the internet), but only if the network is set to Work or Private. 
An additional restriction I've noticed is that by default the application can connect to localhost, but cannot interact with listening sockets created by applications outside of its container (Services, other Apps, etc), which would prevent the application from exploiting anything listening on localhost. 

Filesystem & Registry Restrictions
Inside the AppContainer variable such as %temp% and %localappdata% are reassigned to directories within that container (%localappdata%\Packages\<Container Name>\), which is the only writable path by default. For registry the default accessible path is: HKEY_CURRENT_USER\Software\Classes\Local Settings\Software\Microsoft\Windows\ CurrentVersion\AppContainer\Storage.

Although Apps can be assigned privileges such as WinCapabilityDocumentsLibrarySid (access to My Documents), this is implemented by the App broker process and will not work for desktop applications, instead one must explicitly add the AppContainer's SID to the file/folder's ACL's from the process creating the container (Same goes for other objects such as sections and registry keys).

Process Isolation
Previously low integrity processes could interfere with other low integrity processes, but with AppContainer this is no longer the case. Listing processes will only show the system pseudo-process and any processes running inside that specific container (no desktop processes, services, or other applications), and it's the same story for any other objects created outside of the container. This is pretty handy as browser worker processes usually run as low integrity, which meant that any malware run inside a sandbox would still be able to inject the browser and exfil data.

Kernel Mode Checks
All the actual access checks are part of the Windows kernel, so it's not a case of just removing a few user mode hooks or performing direct system calls, access is restricted at kernel level making AppContainer a great improvement over old sandboxing methods.

Example Code

I've created a little example and test of the AppContainer capabilities in C, it creates a container and executes itself inside the container in order to test the restrictions (Obviously this will only work on Windows 8+ where AppContainer is available).

The test container is given permission to connect to network IPs (but not the internet), the broker also create a text file (%userprofile%\Desktop\allowed_test.txt) and grants the AppContainer access. Other than connecting to network IPs and accessing the App's install directory or the explicitly allowed file, everything else is restricted.


Hidden VNC for Beginners

$
0
0
Hidden VNC is a creative solution to a solution to a problem which stemmed from banking fraud. Back years ago when fraud was uncommon, most banks only had basic IP or Geo-location checks to flag or block accounts if someone logged in from another computer. To combat this, banking trojans would run a SOCKS proxy server on the victims computer, allowing the fraudster to access the victims bank account with the same IP. As fraud became more prominent, banks started coming up with proprietary fraud detection systems which fingerprint the user's systems using a variety of check (Browser, OS/Plugin versions, locale, timezone, etc). The blackbox nature of these systems would require a fraudster to pretty much replicate the victim's system configuration in order to be sure the account wouldn't get blocked, so a more convenient method of fraud had to be found, that method was of course VNC. Fraudsters could VNC into a victims computer and use it to log into their bank account, but obviously this wasn't ideal. If the victim was using the computer, they'd see what the fraudster was doing, and if they weren't, the computer would probably be turned off. What was needed was some kind of VNC software that allowed fraudsters to access the system discretely, at the same time as the victim was using it. 

Hidden VNC

Hidden Desktop
Malware can make use of some little known Windows features such as CreateDesktop and cross-process window subclassing to implement an invisible environment for VNC to run. As most linux users will probably be familiar with, a lot of distros have the ability to run multiple simultaneous desktops with independent taskbars. Windows has had this ability to crate multiple desktops since 2000, but it's not a well known feature and there is no default application to make use of it. By calling CreateDesktop, software can create a hidden desktop and execute applications in the desktop's context. All applications running on the hidden desktop will be invisible to the other desktops (i.e. the one the victim is using), they will not even show in the taskbar outside of the hidden desktop. Sounds simple enough, right?

Screenshots
Most VNC software works by taking periodic screenshots and sending them back to the client; however, Windows does not render any GUI elements to desktops which are not active (currently displayed on the monitor). One can't simply just capture screenshots of the hidden desktop, instead the VNC server would have to call EnumDesktopWindows to get a list of windows running on the hidden desktop, then call PrintWindow on each individual window, writing them to a bitmap in reverse Z-Order (starting with the bottom-most window and working its way to the top-most). Essentially the server is just emulating the screenshot feature by rendering each individual window to a bitmap in reverse of the order they appear on the screen.

Unfortunately, some applications don't properly handle WM_PRINT or WM_PRINTCLIENT messages (sent by PrintWindow), and as a result all or parts of the application will display as a white rectangle, as shown below.


To resolve this, the VNC server would need to implement WM_PRINT and WM_PRINTCLIENT message on behalf of the application, making sure it paints all visible elements to the buffer. This can be done by either injecting code into all processes and hooking various functions in user32.dll, or by using cross-process subclassing to give the VNC server the ability to process window messages destined for the target application from within the VNC process.

User Input
When it comes to user input, the server has to emulate a virtual keyboard / mouse as input would be sent to the active desktop, not the hidden one. Normally when the mouse is moved or clicked the VNC client would sent the position along with a button click event to the VNC server, which would move the mouse to the given position and simulate a click, but because the real keyboard and mouse can't be use, things are far more complicated. The VNC server would have to keep track of every window on the hidden desktop, it's location, and its Z-Index; When a click even is sent, the server would need to find which window is at the cursor's current position by enumerating each window and checking its coordinates and visibility, then use PostMessage to send it a click event. For keyboard the same is true, the VNC server needs to keep track of which window is currently focused and use PostMessage to direct the input towards it.

Conclusion

Hidden VNC is probably one of the most complicated malware features to code and essentially requires coders to implement their own window manager, which is why there are very few unique implementations in the wild (most malware uses a single implementation unimaginatively named HVNC). 

Sadly due to the fact it's a very sought after feature for banking trojans, I'm not going to post proof of concept code; however, I've uploaded some example code to demonstrate creating and switching between multiple desktops, you can find it here: https://github.com/MalwareTech/CreateDesktop/

Device Guard - The Beginning of the End for Malware?

$
0
0
Finally I manage to put together a computer capable of running Device Guard and I've had a little bit of time to play around with the code signing part. Everyone is probably already familiar with x64 driver signature enforcement (64-bit Windows systems can only load signed drivers); Well, now Microsoft has introduced a similar feature for user mode code, which is a huge deal when it comes to malware (Currently the feature is only present on Windows 10 Enterprise, but I'm fairly certain as it matures it will make it's way to home systems).

Device Guard Code Integrity Policy

Device Guard not only adds customizable user mode code integrity checks (UMCI), but re-works a lot of the kernel mode code integrity (KMCI) allowing far more flexibility than just allowing all signed drivers. The policy can either be deployed locally by and administrator or from a domain controller, making it scalable for enterprise networks.

Something I was actually quite surprised by is the fact that the user mode code integrity is not simply limited to executable (I was expecting Device Guard to be just another throw away pseudo-security feature like UAC, but it's clear some real thought has gone into this). 

Scope

Executables 
As already explained, Device Guard isn't just a more flexible version of Kernel Mode Code Signing, it goes the whole nine yards with customizable code integrity policy for executables. Rather than using a flimsy software restriction policy, Device Guard can use an array of different settings to make sure only trusted executables are run. 
Executables violating the policy are simply blocked from running at all.

Dynamic Link Libraries
One of my favorite attacks against HIPS, firewalls, and software restriction policies is DLL hijacking. Simply put, when an application calls LoadLibrary("somedll.dll"), the system first looks for the DLL in the KnowDlls registry key, followed by the applications working folder (where the application was run from), and finally system paths like System32. If you copied a legitimate system application to another folder, then placed an arbitrary DLL in the same folder and gave it the name of a DLL the application dynamically loads, it would load your DLL instead of the real one. Using this method you can bypass all kinds security checks by loading code inside a legitimate system application, without using code injection (which normally triggers HIPS).

Well, it seems Microsoft considered DLL hijacking this time around as all DLLs loaded by an application are checked against the code integrity policy; If a DLL violates the policy, the DLL and application will fail to load (the check is implemented in MiCreateSection, so should apply to any code loaded with NtCreateSection and SEC_IMAGE).
Trying to hijack explorer.exe with an unsigned DLL results in STATUS_SYSTEM_INTEGRITY_POLICY_VIOLATION

Windows Script Hosts & PowerShell
Another long standing issue with antiviruses is malicious scripts; Engines like PowerShell have the ability to access the Win32 API, allowing malware to leverage scripts in order to bypass binary scanning and perform almost all malicious tasks without the need for an executable. 

Device Guard introduces signing of of Windows Script Host scripts, as well as PowerShell to prevent malicious use. Unsigned PowerShell scripts are blocked and PowerShell itself is run in "constrained mode" which prevents it from executing arbitrary code via .NET scripting, COM interface, WinAPI, etc.

PowerShell is in constrained mode and blocks unsigned script.s

Flexibility

Device Guard provides a multitude of mix & match ways to define which applications and drivers can be run (known as file rules), allowing administrators to fine tune policies to their needs. 

Here's a list of some file rule levels currently available:
  • PCA Certificate - All files signed with a leaf certificate belong to the whitelisted PCA Certificate (Ex: Any file signed with a VeriSign Extended Validation certificate).
  • Leaf Certificate - All files signed with a specific code signing certificate (the ones issued to vendors).
  • Hash - Allow a single file by its SHA2 hash (Good for unsigned applications).
  • FileName - Just...just don't.
  • Publisher - Like PCA, but with the ability to only allow applications from certain publishers (the "common name" of the leaf certificate Ex: Only leaf certificates issued to Microsoft).
  • WHQL - Allow kernel drivers which are signed & verified by WHQL.
  • WHQL Publisher - Same as Publisher but only for signed & verified WHQL drivers.
Also allowed is the ability to specify a minimum file version with most of the rules, which is great for stopping malware exploiting old signed drivers to gain kernel mode execution. 

To start off, a policy can be created by scanning the current system and building a list of all all installed applications, then whitelisting them using whichever rule required (it's also possibly to fall back to hashes or file names for unsigned files). By default policies are created with "Audit Mode" enabled, which means when the policy is installed, it won't be enforced but will instead log all files which would have been blocked to the event log.
Example of a CodeIntegrity event

A very handy feature is the ability to create a second policy using the event log, then merge it with a first. This would allow the administrator to set up a test system and build a list of files which would be blocked by the current policy, then review and whitelist  them in a future policy.

Virtualization Based Protection of Code Integrity

This is where Device Guard really comes into its own: If the system is capable of Virtualization Based Security (VBS), Device Guard can be configured to use hypervisor technology in order to isolate parts of the kernel involved in security checks from the rest. With VBS enabled, even if malicious code does somehow manage to get into kernel mode, it would be unable to patch the code responsible for UMCI / KMCI, therefore incapable of installing any code to persist across reboot (or disable the code integrity policy altogether). 

Conclusion

If properly implemented, Device Guard can be used to create a system which is highly resilient to malware (assuming UMCI, KMCI, and VBPCI are enabled and well configured).

  • UMCI prevents an adversary social engineering the victim into running malware (unless they can get hold of a whitelisted certificate). 
  • On Windows 10 Google Chrome & Internet Explorer run inside an isolated container known as AppContainer, so even if the browser was exploited, it'd be run in total isolation.
  • If the code somehow escapes AppContainer, it'd need a method of persisting across reboot, bearing in mind the UMCI policy prevents unsigned code being added to start-up and it's kind of hard to exploit applications during boot.
Although it's still early days, Device Guard is definitely a huge leap in the right direction towards putting an end to malware. Though it's likely going to take some time for such a feature to evolve from a complex set of configurations aimed at experienced network administrators, to an out-of-the-box security system for end users.

Kelihos Analysis - Part 1

$
0
0
In the recent years I've noticed a shift in the malware economy from botnets to ransomware, which is likely due to the AV industry employing more aggressive tactics against botnets resulting in a drop in profitability. As I've said before: ransomware is about as interesting to me is watching oil dry and they're so basic that they aren't worth reversing, so I decided to look at something old but

Exploring Peer to Peer Botnets

$
0
0
Peer to Peer and Everything In between Back in October I'd gotten bored of the endless stream of cryptolockers and PoS trojan, so decided to look at something old school, that something was Kelihos. Since then, I've come to realize that P2P botnet monitoring brings together two of my favorite areas of security: Reverse Engineering and Programming. As a fun little side project, I decided to

Backdoored Ransomware for Educational Purposes

$
0
0
Here is an interesting article I found this week, it's about how A researcher released two pieces of 'educational' ransomware which were secretly backdoored in order to own some advanced and prolific cyber-criminals a small number of scriptkiddies. There two pieces were HiddenTear (a ransomware with deliberately insecure cryptography designed to make decryption of files always possible), and 

When Scriptkiddies Attack

$
0
0
Usually I don't blog about the hundreds of ridiculous or down right crazy emails I receive each year, but this exchange makes all the others seem completely reasonable in comparison. Normally my unwanted emails range from people asking obviously blackhat questions presented as whitehat questions to offers of under the table payments in return for coding malware, but this email was something

Necurs.P2P - A New Hybrid Peer-to-Peer Botnet

$
0
0
Last week I received a tip about a sample displaying some indication that it could be peer-to-peer (a large amount of UDP traffic being sent to residential IPs), after a couple days of analysis I was able to confirm that not only was it peer-to-peer but also currently active. The person who tipped me off was friend and researcher R136a1 who seems to be on a roll lately (not only did he find this

DDoSing with Other People's Botnets

$
0
0
While I was reverse engineering ZeroAccess in order to write a monitoring system, I had an idea which would allow me to use ZeroAccess C&C infrastructure to reflect and amplify a UDP based DDoS attack, which I'd found to be beautifully ironic. After further analysis, I discovered it may even be possible to use non worker bots (which connect from behind NAT) to participate in the attack. Zero

Let's Analyze: Dridex (Part 1)

$
0
0
Due to popular request I'm starting a new reverse engineering article series which will detail how I go about analyzing various samples, instead of just presenting my findings like I normally do. Most of the posts will be centered around IDA Pro (evaluation edition should work too) with WinDbg as a backend (you can use whatever backend you're comfortable with). If you're using something like

Let's Analyze: Dridex (Part 2)

$
0
0
In the previous article we went over how to dump the names of the majority of functions dridex resolves dynamically to complicate analysis. Today we will be using some similar methods to get the other main piece of the puzzle (encrypted string). Encrypted Strings As we've already got a nice list of functions called, we can look for those involved in string operations such as

Let's Analyze: Dridex (Part 3)

$
0
0
Sorry for the longer than expected delay, occasionally the Dridex group will take the servers offline during the weekend and resume normal operations on Monday; however, it appears they decided to take an extended break as the network went offline at some point a week ago, preventing me from fetching the payload. If like me you got caught out by the bot binary updating when the network came back

Dridex Updates Payload Distribution

$
0
0
Dridex spreads mainly using Office documents containing malicious macros, initially the primary stage would involve using VBA (Visual Basic for Applications) to download and execute the loader from one of multiple servers, though this had some flaws. Antivirus and Firewall vendors maintain a list of malicious URLs and IP addresses in order to block new malware infections or updates from current

Infosec Without a Degree

$
0
0
I've seen plenty blogs from people who got into infosec through the academic route, so i figured I'd cover the other side and try to answer the three most asked questions I get via email and twitter: "Do I need a degree to get a job in infosec?", "Will a degree help me get a job in in infosec?", and "How Did You Get Into Infosec?". Though I don't have a short answer to these questions, I felt I

How Cerber's Hash Factory Works

$
0
0
Recently I saw a story on SecurityWeek about how the Cerber ransomware morphs every 15 seconds (each download results in a file with a new hash), which I then tracked back to the source, this article by Invincea. The various news articles made some dubious claims which can be put down to information lost in translation between reporters and an researcher or marketing, but what really piqued my